How To Sight In A Crossbow Scope For Precision Shooting
Sighting in a crossbow scope is an essential skill for all crossbow hunters and enthusiasts alike. Achieving perfect aim with your crossbow is crucial to accurately hit your targets, whether you’re out in the woods hunting or practicing at the range. So, let’s go through the step-by-step process of properly sighting in your crossbow scope to help you maximize your accuracy and shooting confidence.
Understanding Crossbow and Scope
When you’re getting into crossbow shooting, it’s important to know the basics of both the crossbow and the scope. A solid understanding of these components will help you become more accurate and confident in your shots.
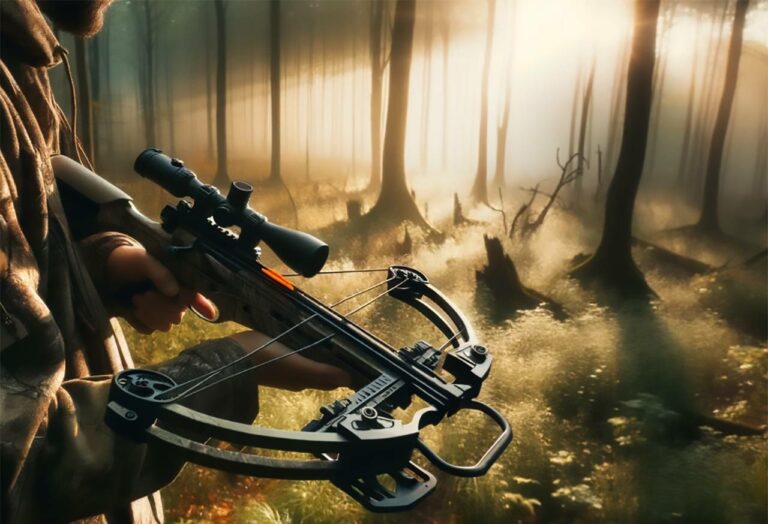
A crossbow is made up of several key parts: the stock, limbs, string, trigger, and rail. The stock is where you hold the crossbow, while the limbs and string provide the power to shoot the arrow (also known as a bolt). The trigger releases the string, propelling the bolt forward. The rail is the surface on which the bolt sits, guiding it as it leaves the crossbow.
Now, let’s talk about the components of a crossbow scope, a crucial accessory for your crossbow, as it helps improve your accuracy and allows you to make more precise shots.
- Reticle: The crosshair or pattern in the scope that helps you aim.
- Objective lens: The front lens that gathers light and creates the image, measured in millimeters (mm).
- Eyepiece: The part of the scope you look through to view your target.
- Windage and elevation adjustments: These knobs help you make adjustments to your scope’s aim, compensating for wind or elevation differences.
Selecting the Right Crossbow Scope
When choosing the perfect crossbow scope, it all comes down to your personal preference, shooting style, and intended use. A great crossbow scope can significantly improve your hunting experience, so take your time and consider the following factors:
Type of Scope: Crossbow scopes come in two primary types – optical scopes and red dot sights. Optical scopes have a variety of reticles to choose from, while red dot sights offer a simple aiming point without magnification. For longer-range shots, you may want to opt for an optical scope with adjustable magnification. If quick target acquisition is your goal, a red dot sight might be the better choice.
Optical Reticle: Reticles in crossbow scopes vary from a simple crosshair to more advanced reticles with additional features. Consider your hunting conditions and distance, as well as your preferred aiming style. Some popular types of reticles are:
- Multi-reticle: Offers multiple horizontal lines for varied ranges
- Single-reticle: A simple crosshair that requires holdover for different distances
- Range-finding reticle: These reticles have markings to help estimate the distance of the target
Red Dot vs. Reticles: Red dot sights offer a straightforward aiming point without magnification, making it easy for fast target acquisition. However, the lack of magnification can limit your range if you’re shooting at longer distances. Depending on your aiming style and hunting situations, you may prefer either a red dot or a reticle-based scope.
Model: Model makes a difference in crossbow scopes, as higher-end models tend to use higher-grade materials and may be finer tuned for accuracy. Pay attention to features such as the quality of glass, overall durability, and ease of adjustments for windage and elevation.
Remember, selecting the right crossbow scope ultimately depends on your needs and preferences. Take your time, consider the factors previously mentioned, and you’ll be well on your way to boosting your shooting accuracy and enjoying your hunting experience even more.
Properly Mounting Your Crossbow Scope
Before you can sight in your crossbow scope, you need to make sure it’s properly mounted. This is a crucial step to ensure accuracy and consistency when shooting. Follow these simple steps to mount your crossbow scope:
- Attach the scope rings: First, you need to secure your scope to the crossbow using scope rings. Ensure that the rings are the correct size for your scope tube. Loosely attach the rings onto the rail of your crossbow, ensuring they are aligned and spaced appropriately.
- Place the scope in the rings: Now, gently place your scope in the rings. Make sure it’s positioned with the eyepiece facing you and the objective lens facing toward the front of the crossbow.
- Level the crossbow and scope: Before tightening the screws, it’s essential to level your crossbow and scope. Place your crossbow on a stable and level surface. Use a bubble level to ensure the crossbow is level, then place the level across the scope’s elevation turret to make sure it’s level as well.
- Adjust for eye relief: Proper eye relief prevents eye strain and ensures a clear view through your scope. To set the appropriate eye relief, position yourself comfortably behind the crossbow with your head in its natural shooting position. Slide the scope back and forth within the rings until you have a full, clear view of the reticle with no dark edges (known as vignetting).
- Tighten the screws: Once you’ve set the proper eye relief, double-check that the scope is still level. Hold the scope in place and tighten the scope ring screws gradually and evenly, alternating between screws on each side of the ring. Be careful not to overtighten the screws, as this can damage your scope or affect its performance.
After following these steps, your crossbow scope should be securely mounted and ready for sighting. Remember, taking your time during this process will help improve your overall shooting accuracy and make sighting easier and more accurate.
Setting Up the Crossbow Scope for Accuracy
Before you get started with sighting in your crossbow scope, you’ll need to ensure the scope is properly mounted and leveled on your crossbow. It’s also essential to have a serviceable block target for practice—an empty box will work just fine.
To check the mounting and leveling of your crossbow scope:
Set up a target at your chosen zeroing distance. For most crossbows, it’s ideal to use a distance between 20 to 30 yards. Make sure the target is placed against a suitable backstop and safely away from any non-target objects.
Take a few shots at the target.
Analyze where your arrows hit in relation to the bullseye. This will give you an idea of which adjustments you’ll need to make, using the windage and elevation knobs on your scope.
Leveling Up with Windage and Elevation Knobs
The windage adjustment controls the horizontal movement of your crossbow’s point of impact, while the elevation adjustment deals with the vertical movement. Most crossbow scopes come with dials or knobs for these adjustments. Familiarize yourself with these knobs and their functions, following the instruction manual that came with your scope.
Typically, you’ll need screwdrivers to adjust the windage and elevation screws. Each click represents a small, precise adjustment. Be patient while making these adjustments, especially as you begin testing your shots after each change. It’s essential to make only small, incremental adjustments and track how each change affects your performance.
Remember, sighting in a crossbow scope can be a gradual process, and achieving optimal accuracy may require multiple sessions.
Understanding Distance and Shooting
When sighting in your crossbow scope, one crucial aspect to consider is distance. Familiarizing yourself with various distances and shooting ranges will significantly impact your accuracy. Let’s go over the key factors that will help you understand distance and shooting.
Distance: As you start, place your target at a shorter distance (around 20 feet). Once you’re confident hitting the sweet spot at that range, move the target further back, say about 40 feet, and repeat the process. Continue increasing the distance in increments to build a solid understanding of how to sight in your scope with success.
Shooting Range: Visiting a shooting range can be beneficial in perfecting your skills. Many ranges offer various distances and target sizes, giving you an excellent opportunity to practice adjusting your scope and accuracy. At the shooting range, always adhere to safety rules and guidelines.
Targets: While practicing, use different targets that vary in size, color, and shape. This will help you become skilled in adjusting for various hunting or competition situations. When you’re shooting at longer distances, use larger targets to accommodate for the natural arrow drop.
Experimentation and patience are key to understanding distance and shooting. As you become more adept at sighting in your crossbow scope at different ranges and targets, you’ll find your accuracy and precision improving. Keep practicing and soon, you’ll be hitting your mark with ease.
Fine-Tuning Windage and Elevation Adjustments
When it comes to accurate shooting with a crossbow, fine-tuning your scope’s windage and elevation adjustments is essential. Windage adjustments allow you to compensate for wind direction, while elevation adjustments help match the scope to your crossbow’s arrow trajectory.
This is a delicate process, so here’s a more in-depth breakdown of what you’re doing.
Windage
Once you have a feel for the trajectory of your crossbow, which you get from taking a few shots, it’s time to adjust the windage. Begin by checking the wind speed and direction. This can be done with a wind meter or by observing the environment around you. Make note of it and remember that windage adjustments are typically made using the scope’s left and right dials. Adjust the dials accordingly to compensate for the wind.
Elevation
After you’ve adjusted for wind, it’s time to address elevation. Depending on the distance of your target, you might find that your arrows are hitting too high or too low. Use the top and bottom dials on your scope to make the necessary elevation adjustments. These should bring your arrows closer to the bullseye.
Now that your windage and elevation settings have been adjusted, take a few more shots at your target distance. Observe the impact points and adjust the dials as needed for a more precise shot.
At this point, your windage and elevation adjustments should be dialed in, and you should be able to consistently hit the bullseye or near it. Keep practicing to maintain your accuracy and don’t hesitate to re-adjust as needed, especially when shooting in various conditions or at different distances.
Maintaining Accuracy with Crossbow Scope
Maintaining accuracy with your crossbow scope is essential for consistent performance. When sighting in your crossbow scope, it’s crucial to pay attention to a few key factors such as grouping, bolts, arrows, and drop compensation.
Grouping
When practicing with your crossbow, aim for consistent grouping of your shots, as tighter groups will indicate better accuracy. To achieve this, ensure that you’re using the correct bolts and arrows for your crossbow. Bolts and arrows come in various lengths, weights, and materials, so make sure they’re compatible with your crossbow to avoid negatively affecting your accuracy.
Bolt and Arrow Considerations:
- Match bolt weight to your crossbow’s specifications
- Ensure consistent fletching and arrow length across your bolts
- Inspect for damage or warping before use
Properly maintaining your crossbow will also play a significant role in maintaining accuracy. This includes routinely checking the strings, cables, and limbs for damage or wear, and making necessary adjustments or replacements.
Drop Compensation
When sighting at different distances, don’t forget to account for drop compensation. Crossbow scopes typically feature multiple lines or dots in the reticle that correspond to different distances (such as 20, 30, and 40 yards). Use these markers to adjust for the expected drop in your arrow’s trajectory when aiming at targets farther away.
Special Types of Crossbow Scopes
When it comes to sighting in your crossbow scope, you might encounter some special types of crossbow scopes that require a slightly different approach. Two of these special types are variable power scopes and drop-compensating reticle scopes.
Variable Power Scopes
Variable power scopes allow you to adjust the magnification of the scope depending on your needs. This flexibility means that you can adapt to various distances and target sizes. When sighting in a variable power scope:
- Decide on the magnification you’ll most likely use while hunting or shooting. Remember, higher magnification may affect clarity at shorter distances.
- Sight in your crossbow at your preferred magnification and chosen distance, typically 20 yards to start.
- If you plan to use different magnifications, change the power setting and then shoot again to confirm your accuracy. You may need to make minor adjustments to account for changes in magnification.
Drop-compensating Reticle Scopes
Drop-compensating reticle scopes are designed to help account for the drop in an arrow’s trajectory as it flies. These scopes feature a series of horizontal lines or other markings that represent specific distances. When sighting in a drop-compensating reticle scope:
- Start by sighting in the main crosshair or reticle at 20 yards. This is your baseline distance.
- Adjust your elevation turret to account for the arrow’s drop at longer distances. The farther you shoot, the more drop you’ll experience.
- Confirm your accuracy at various distances, using the corresponding reticle markings as your aiming points. Keep in mind that the markings may not perfectly match your arrow’s flight, so be prepared to make slight adjustments as needed.
Utilizing Auxiliary Devices and Techniques
When sighting in your crossbow scope, incorporating auxiliary devices and techniques can greatly enhance your accuracy and shooting experience. Let’s dive into a few handy tools and methods to maximize your precision.
Shooting Aid
Using a shooting aid, such as a bench rest or shooting sticks, can provide stability during the sighting process. By minimizing the movement of your crossbow, shooting aids can help ensure consistent aim and improve the accuracy of each shot. Don’t forget to consider the conditions in which you’ll be using your crossbow, as some shooting aids may be more suitable for specific environments or situations.
Chronograph
A chronograph is a valuable tool for measuring the speed of your crossbow’s bolts. Knowing the exact velocity of your bolts will allow you to make precise adjustments to your scope, which in turn will help increase accuracy. By experimenting with different types of bolts and arrowheads, you can find the ideal combination for your specific crossbow and shooting preferences.
Techniques
- Developing proper shooting techniques is essential for accuracy when sighting in your crossbow scope. To use proper technique:
- Make sure to keep a consistent anchor point by positioning the crossbow’s stock firmly against your shoulder and cheek.
- Place your hands to ensure your grip is comfortable and stable while minimizing hand torque.
- Focus on proper trigger control, gently squeezing the trigger with the tip of your finger to avoid jerking the crossbow.
By utilizing these auxiliary devices and techniques, you can greatly improve your chances of accurately sighting in your crossbow scope and ultimately achieving greater success in your shooting endeavors.
Calibrating a Crossbow Scope for Success
Sighting in a crossbow scope is not just a one-time task but an ongoing commitment to accuracy and safety. Regularly checking and fine-tuning your scope ensures that, when the moment of truth arrives, you can trust your equipment to perform as expected.
Remember, the precision of a crossbow is only as good as the effort put into calibrating its scope. By investing time in learning to properly sight in your crossbow, you’re setting the stage for consistent shooting success. Preparation breeds confidence, and in the world of crossbow shooting, that confidence can be the difference between a miss and a perfect shot.


