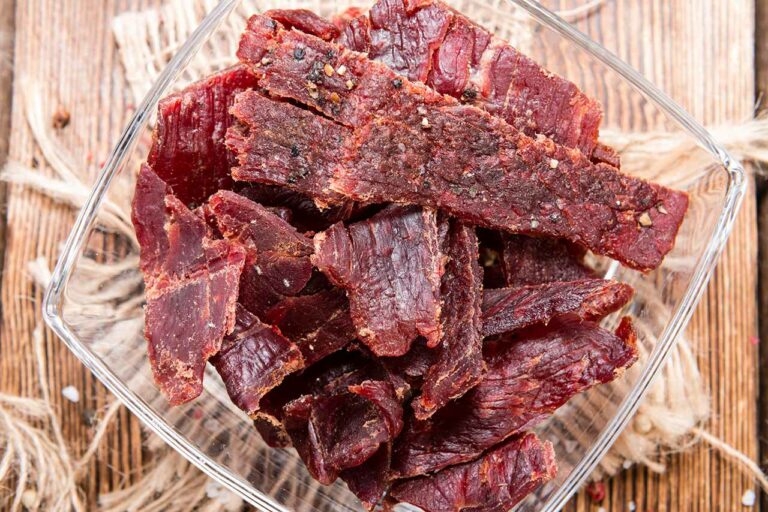
How To Make Beef Jerky In A Food Dehydrator
Beef jerky is a favorite storable for many survivalists and outdoor enthusiasts, but it can be quite expensive when purchased from a store, especially when you want to keep a large supply. But did you know making beef jerky in a food dehydrator at home is not only cost-effective, but allows you to control the quality of the ingredients and to experiment with flavors? You don’t need to be a professional chef or spend countless hours in the kitchen. With a food dehydrator and a bit of preparation, you can easily make delicious and nutritious beef jerky right in your own home.
Choosing and Preparing the Beef
When making beef jerky in a food dehydrator, the first step is to select a lean piece of meat. You want as little fat as possible, as fat can reduce the shelf life of your jerky. Good choices for jerky meat include eye of round roast, top and bottom round roasts, flank steak, and sirloin tip.
Slicing the Beef
Before you start to slice, you’ll need a good, sharp knife and a couple of hours. Place your selected meat in a zip-top bag, press out excess air, and freeze the beef for 1-2 hours. This will make the meat easier to slice. When you’re ready to start slicing, there are two main approaches:
- Against the grain: Cutting against the grain will give you a more tender beef jerky. Slice your meat thinly, about 1/8- to 1/4-inch thick, depending on your preference. Cutting against the grain will also make the jerky easier to chew.
- With the grain: Cutting with the grain results in a chewier jerky. You’ll still want thin slices, but you’ll be cutting in the same direction as the muscle fibers. This allows for a tougher texture, which some people prefer.
Remember, when cutting, it’s crucial to trim off any excess fat you find, as this will improve the final product’s shelf life.
Meat Tenderizing
Once you’ve sliced your beef jerky meat, it’s time to think about tenderizing. There are a couple of ways to help achieve a more tender result:
- Marinate: A good marinade can break down the muscle fibers in the meat and enhance the flavor of your jerky. Choose a marinade with acidic ingredients like vinegar, lemon juice, or yogurt. Marinate your sliced meat for several hours to overnight for a more tender jerky with a richer flavor.
- Meat Tenderizer: Using a mechanical meat tenderizer, such as a mallet, can help break down the fibers and make the meat more tender. Flatten the slices to your desired thickness before marinating.
Remember, it’s important to balance tenderness and toughness to your personal preferences. Experiment with different methods and ingredients to find the perfect result for your taste.
Crafting the Marinade & Marinating the Beef
Creating the perfect marinade for your beef jerky is an art and a science. The right combination of flavors will elevate your homemade beef jerky to new heights. Mix and match ingredients to find your ideal taste, but start with a simple base recipe and build from there.
For a basic yet flavorful marinade for beef jerky, combine the following ingredients:
- 1 cup soy sauce
- 1/2 cup brown sugar
- 1/4 cup honey
- 2 tsp ground black pepper
- 1 tsp garlic powder
- 1 tsp onion powder
- 1/2 tsp liquid smoke (optional)
- 1/2 tsp red pepper flakes (optional, for some heat)
Experiment with spices and seasonings to create your own unique flavor profile. Some additional ingredients you might consider adding are:
- Salt to enhance the flavors
- Cayenne pepper for a kick of heat
- Smoked or regular paprika for a smoky touch
- Your favorite premade seasoning blends for convenience
When you’ve decided on your spice mixture, combine it with the base recipe above to create your beef jerky marinade. Mix the marinade thoroughly, making sure the sugar and spices are fully dissolved.
Now that you’ve crafted your marinade, it’s time to put it to work. Place your thinly sliced lean beef (such as flank steak, bottom round, top round, or sirloin tip) in a resealable bag or airtight container. Pour the marinade over the meat, ensuring every piece is coated. Seal the container and refrigerate your marinating beef for at least 6 hours, or even better, overnight. The longer the meat soaks in this flavorful mixture, the more intense and infused the jerky’s taste will be.
Remember, your beef jerky marinade is a personal choice, so don’t be afraid to tweak the recipe to suit your own tastes. With a little practice and experimentation, you’ll find the perfect blend to make your beef jerky a true masterpiece.
Preservative Ingredients
The primary ingredient that can enhance the shelf-life of beef jerky is salt, which is part of the marinade above in the form of soy sauce. Salt is a well-known preservative that can help to inhibit the growth of bacteria and molds.
To make your jerky last longer, you may also consider some of the following adjustments or additions to your marinade:
1. Increase the salt content.
Consider adding more soy sauce or using a higher concentration of pure salt.
2. Use preservatives.
Sodium nitrate, commonly used in commercial jerky, can prevent bacterial growth and enhance the color of the jerky. Just note that its usage can be controversial due to potential health concerns.
Vinegar is a more natural preservative that can create an environment less hospitable to microbes, which could potentially extend your jerky’s shelf life to some extent.
3. Up the sugar content.
Sugar, like salt, can act as a preservative, though it generally must be used in quite high concentrations to do so effectively. So, while sugar might be used for longer preservation, it could make your jerky to sweet to eat.
4. Consider the use of antioxidants.
Antioxidants like ascorbic acid or citric acid can be added to jerky to inhibit oxidation, another spoilage process.
Rosemary extract, a natural antioxidant, can be added for the same effect.
Drying the Beef in the Dehydrator
So, you’ve prepped your lean meat and you’re ready to dehydrate some tasty homemade beef jerky. Let’s get into the details of drying the jerky in your food dehydrator.
First, set your dehydrator’s temperature between 165°F (74°C) and 175°F (79°C). This range allows for proper dehydration while killing most bacteria. Remember, maintaining a constant temperature is crucial for even drying.
Before placing the meat in the dehydrator, give it a quick pat down with paper towels to remove any excess marinade. That done, lay the strips evenly on the dehydrator trays, ensuring they don’t overlap. This will help with proper air circulation and even drying.
As for the drying time, a few factors come into play, such as meat thickness and the specific dehydrator you’re using. Here’s a general guideline based on meat thickness:
- Thin slices (1/8 to 1/4 inch) in a dehydrator: 3 to 5 hours
- Thicker slices (1/2 inch or more) in a dehydrator: 7 to 10 hours (potentially more)
Keep an eye on your jerky during the drying process. You’ll notice a change in texture, and the color should darken. To test for doneness, take a piece of jerky from the dehydrator and observe it. The surface should appear leathery and be devoid of any visible moisture beads.
After the jerky cools for a few minutes, bend it. It should be flexible and should possibly crack, but not break. If you tear it apart, the meat should have a thread-like appearance. If you press on it with a paper towel, only a little oil, and not moisture, should come out.
If your jerky passes all of these tests, it’s likely finished.
Storing the Jerky
Once you’ve produced your lovely homemade beef jerky, there are a few methods you can use to store it long-term. The most long-lasting jerky storage option is to freeze it. This not only extends its shelf life, but keeps it fresh and flavorful.
To freeze your homemade beef jerky, follow these steps:
- Allow the jerky to cool completely after removing it from the dehydrator.
- Place the cooled jerky in an airtight container or resealable plastic freezer bag.
- If you have a vacuum sealer, use it to remove any excess air from the bag or container. This step is crucial, as it helps prevent freezer burn and prolongs the shelf life of your jerky.
- Clearly label the container or bag with the date and type of jerky.
- Place the well-sealed jerky in your freezer for up to six months.
When you’re ready to enjoy your homemade beef jerky, simply remove the desired amount from the freezer and let it thaw at room temperature. Once thawed, it’s essential to consume the jerky within a week to ensure its freshness.